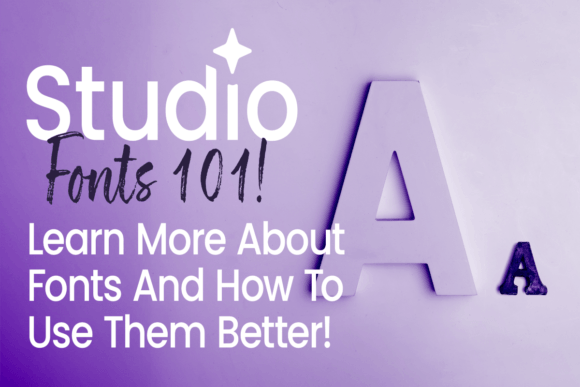
Mastering Slimline Card Sentiments with Two Font Techniques
The Power of Layered and Outline Sentiments
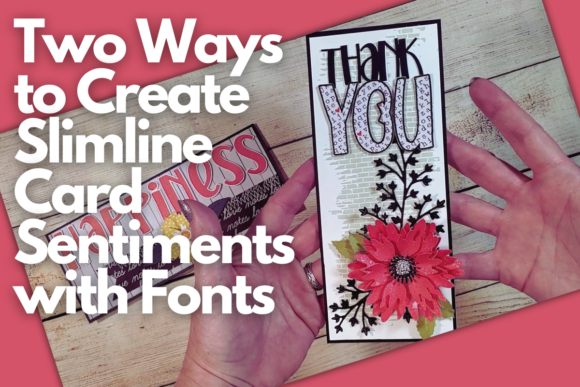
Creating slimline cards with bold, personalized sentiments is a game-changer for any crafter looking to elevate their work. In this class, we move beyond simple text placement. You'll discover how to leverage your own font library within Cricut Design Space to produce two distinct styles: a layered sentiment for depth and dimension, and a crisp outline sentiment for a clean, modern look. These techniques are not just about cutting letters; they're about understanding how typography functions as a key design element on your card.
The visual appeal of a well-crafted sentiment lies in its integration with the overall design. A layered sentiment, built using the offset tool, creates a subtle shadow effect that makes your message pop off the cardstock. It adds a professional, tactile quality that invites the viewer to look closer. Conversely, an outline sentiment offers a lighter touch, perfect for when you want the text to complement rather than dominate the floral elements or patterned backgrounds. Both approaches, taught by Miss Carrie, transform standard text into a custom design asset.
Practical Applications Beyond the Card Front
While our focus is on floral slimline cards, the principles of creating these custom sentiments have broad applications. Consider how this skill translates across different projects. For a small business owner, this technique allows you to create unique, branded thank-you cards or promotional materials that stand out. A blogger or content creator can produce consistent, on-brand graphics for social media graphics or editorial design layouts. The ability to manipulate any font—be it a serif font for elegance or a sans serif font for clarity—into a cuttable layer or outline is a fundamental skill in modern typography for makers.
This method essentially turns any premium font you own into a versatile creative font for physical products. It's about taking digital assets and giving them a tangible, professional finish. You're not limited to pre-made sentiment stamps or dies. You have the freedom to use a script font for a whimsical wedding card or a bold display font for a birthday headline, each time achieving a polished result that aligns with your project's personality and your own brand identity.
Choosing the Right Font for Your Sentiment
Not every typeface is ideal for this process. When selecting a font, consider its weight and complexity. A very thin handwritten font might not cut cleanly at small sizes, while an overly ornate script font could cause issues with the offset tool, leading to messy layers. The best candidates are fonts with clear, consistent strokes. Test your chosen font in Cricut Design Space first by writing a simple word. Examine the spacing and how the letters connect. This quick check can save you from wasted material and frustration.
Think about the mood you want to convey. A serif font like Times New Roman can impart a classic, authoritative feel, suitable for formal occasions. A geometric sans serif like Futura feels modern and clean, perfect for contemporary designs. For a personal, artisanal touch, a well-crafted handwritten font is ideal. The key is to ensure the font's personality matches the card's theme and the recipient's expectations. This thoughtful selection is a core part of professional graphic design and contributes directly to effective visual hierarchy.
Integrating Sentiments with Floral Elements
The class pairs these sentiment techniques with layered three-dimensional flowers, creating a beautiful interplay between text and imagery. The sentiment should not fight for attention with the flowers; it should guide the eye. A layered sentiment often works best when placed as a central focal point, with the floral arrangement framing it. An outline sentiment can be nestled among the flowers for a more integrated, seamless look. Consider the scale of your sentiment relative to the floral elements to maintain balance and readability.
This process mirrors professional packaging design or web design principles, where text and image must coexist harmoniously. You're making conscious decisions about font pairing—not just between two fonts, but between your chosen typeface and the organic shapes of the flowers. The result is a cohesive piece where every element supports the overall message and aesthetic. This level of intentionality is what separates casual crafting from thoughtful design, enhancing both the professionalism and the emotional impact of your work.
From Intermediate Skill to Creative Confidence
This intermediate-level class is designed for those ready to move beyond basic cuts. You'll gain a deeper understanding of how tools in Cricut Design Space can be used creatively, not just functionally. Learning to manipulate the offset tool for sentiment creation opens the door to other design possibilities, such as creating shadow effects for titles or designing custom stickers. The downloadable font and flower graphic provided in the class give you a starting point to practice immediately, reinforcing the techniques in a hands-on way.
Ultimately, mastering these two ways to create sentiments empowers you as a maker. It reduces your reliance on pre-made elements and gives you full creative control. Whether you're making cards for personal enjoyment, building inventory for a craft business, or developing assets for a client's brand identity, these skills are directly applicable. You'll approach your Cricut projects with more confidence, knowing you can execute a polished, professional vision from a simple idea to a finished, dimensional card that truly resonates.